OVERVIEW
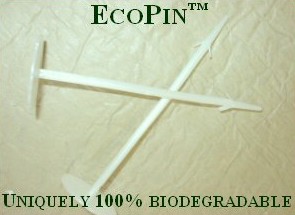
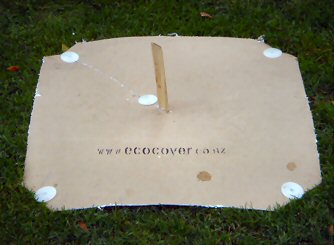
The new EcoCover EcoPin [Photo 1 above] is a world first and has been designed by drawing on EcoCover’s wide and practical experience in the field. The EcoCover staff, in conjunction with selected commercial users, have now successfully trialled thousands of EcoPins and fully appreciate the challenges that may arise with difficult land slope and profile; weeds; rough hard soil; etc.
Unique features include 100% biodegradability, yet with very high impact strength, and especially designed barbs on the shaft to assist with the EcoPin positioning and holding power in the soil.
When first laid, EcoCover mulch mat is quite rigid. In applications where the product is not being covered by decorative mulch such as bark or river stones for example, there is a risk, particularly in high wind areas of the product suffering damage unless it is securely pinned to the ground. Very exposed areas may require EcoCover’s new EcoCoverRF™, a hessian reinforced, 100% biodegradable mulch mat to ensure long term stability and durability. [Refer Photo 3]
Within a relatively short period EcoCover absorbs moisture, becomes malleable, contours to the soil surface and bonds to it over time. At that point the risk of wind damage to the mat is minimal however in the early stages of the product life, pinning and securing is very important.
The following instructions are therefore critical in obtaining the maximum benefit from EcoCover. It must be securely held in place and the degree of pinning to the ground will be dependent on the local environment particularly in relation to land contour, wind and rainfall.
For the correct product and pinning advice before laying, contact the nearest EcoCover office.
INSTRUCTIONS
The maximum roll length of EcoCover mulch mat is 20m (65 feet) and the maximum available width is 2m (78 inches). Pinning is usually required for mulch mat.
EcoCrop™ mat used in broadacre applications is available in 100m+ (328ft+) roll lengths and the same widths as for mulch mat. EcoCrop mat is secured in broadacre applications as for plastic.
Standard roll widths are approximately:
| 2m (78in) | 1m (39in) |
| 65cm (26in) | 50cm (19in) |
Ground Preparation. Prior to laying EcoCover, either in continuous roll form or weed squares, the ground must be prepared as for all other plastic or fabric mulches – free of large weeds, long grasses, rocks and other detritus. The EcoCover needs to be laid as close to the soil surface as possible to optimise the product attributes.
EcoPin Spacing. The EcoPin has been designed to provide a secure pinning method into most soil types. Pinning the mat securely is critical to its productive life and this is best achieved by ensuring the EcoPin spacing is no greater than 50cm (19in) maximum along all edges. In high wind prone areas 30cm (12in) spacing or possibly even less is preferred, unless EcoCoverRF is being used, in which case standard pinning distances may apply. Pinning the mat centres in the case of a 2m wide strip is usually adequate every 1m (38in).
Pinning Method. Securing the EcoPins through a folded edge or overlap so that the purchase is through a double layer of EcoCover is helpful. When laying, it is not necessary to drive the EcoPin hard into the ground creasing the EcoCover, as a snug fit of the mat to the soil surface is all that is required. EcoPins are best hammered into the ground with a rubber mallet. We recommend all joins be overlapped by no less than 12cm (5in) and the EcoPins secured through both layers to provide good purchase. EcoCover may be subject to a small amount of shrinkage.
EcoPin + PVA + Tape. For high wind prone areas, EcoCoverRF may be necessary [Refer Photo 3]. A PVA liquid adhesive can also be sprayed on overlapped joins to provide good contact, or a paper tape along the join can be used in addition to the EcoPins. See Image
Land Contour. Ensure the EcoCover mat is not stretched across land contours (even small contours) and then pinned. The mat, when it becomes wet, will endeavour to contour itself to the soil surface and due to its wet weight, the EcoPins will break through the surface. Just allow the mat to lie naturally prior to pinning and certainly use more EcoPins in the early life of the mat rather than fewer. EcoPins can possibly be reused at a later date by removing from the mat once biodegradation of the mulch is well advanced.
Mulch Mat Damage. Should the mat become damaged during installation, or by machinery post installation, patching is very easy. EcoCover can be cut to any size / shape and inserted as a patch over the top or underneath any damage. Ensure the patch is pinned, taped or glued securely in place.
Weather. It is recommended that standard EcoCover is not laid during high winds or heavy rain although EcoCoverRF is sufficiently durable for laying in most weather conditions. The ground beneath the mat needs to be firm enough to work on. It is recommended EcoCover is laid over any (drip) irrigation lines and care is taken if laying the standard mulch mat in wet conditions, as it is prone to easy damage when saturated.
Note – Drawings are not to scale and are not representative of the correct EcoPin spacing.
Diagram 1
Correct EcoPin angle providing maximum purchase through the EcoCover and minimising potential wind lift.
1. ROLL FORM
ROW OF EXISTING PLANTING
There are two methods of laying EcoCover continuously along an existing plant row.
Option 1 – 1 continuous piece of EcoCover
EcoCover is laid adjacent to the row as a continuous length then slit straight (represented by the dashed lines in the diagram 2 below) with a sharp blade to approximately half the width of the mat. Each slit is centred to a plant stem.
Diagram 2
EcoCover is then pulled through the slits to meet the plant stem so that half of the mat width now lies on either side of the plant. It is then pinned appropriately ensuring all edges are secured against wind movement. Pinning is also required at the base of each plant stem to prevent weed growth. The slit edges should be overlapped prior to pinning. Pinning the plant stem and slit edge is illustrated in diagram 3 below.
Diagram 3

For early plantings with slender stems this is an easy method to use, whereas for larger stems and more mature plantings, option 2 below is preferred.
Option 2 – 2 pieces of EcoCover
EcoCover is laid down either side of the row, each side half the required finished width. Refer diagram 4 below.
Diagram 4
Pull the mats toward each other so that they overlap (represented by the solid and dotted lines in the centre of diagram 5 below) and EcoPin securely. The area around each stem may require a small slit in both mats to allow the overlap depending on stem size.
Ensure all edges (the solid lines) are securely pinned for any wind movement. The overlap should allow for the direction of the prevailing wind indicated by the arrows in diagram 5 below.
Diagram 5
2. ROLL FORM
BANKS, SLOPES, LARGE FLAT AREAS
There are several considerations to take into account when planting large areas on either flat or slopinged ground.
For example:
| If the area to be planted has existing plants / trees / shrubs, consider using appropriately sized weed squares [for standard sizes refer Product Information section on website] to surround the existing plant stems in the first instance, then lay EcoCover in roll form across and along the edges of the weed squares, endeavour to keep the rolls as intact as possible, pinning over the edges of the weed squares. This will prevent the rolls having to be cut to fit and make laying a great deal easier. Correct pinning is essential particularly along all leading edges and overlaps. Weed squares may be laid on their own to prevent weed growth. | |
| Where planting on a slope it is preferable to lay the EcoCover horizontally rather than vertically, that is, along the face of the bank rather than running strips down the slope. Horizontal laying will usually present fewer edges to the wind and the best method is to commence laying from the top overlap (tuck under and pin) as the mat is laid down the slope as illustrated in diagram 6 below. On particularly steep areas, providing the EcoCover is dry, it is perfectly acceptable to lay a ladder on the mat to plant and pin.For best results on difficult sites, EcoCoverRF is strongly recommended. EcoCoverRF can also be laid during adverse weather, being very robust. [Refer photo 3 for a close up of EcoCoverRF].Refer diagram 6. The EcoCover is represented by the brown lines as a side on view to illustrate the direction of the overlap if the mat is laid horizontally. Horizontal laying is possible for slopes up to about 25 degrees, beyond that it is difficult to lay the mat out and pin as you work down the slope, therefore vertical laying is quite acceptable providing all leading edges are properly secured. |
This can be achieved by:
- 1. Very close pinning (parallel to the edges) through the two layers, at a pin spacing of no greater than 30cm (12in).
- 2. Secure by using a sprayed application of PVA adhesive or sticky paper tape (refer diagram 10) along the overlaps.
Preventing the wind entering under the mat and lifting it away from the EcoPin is critical to the mat’s integrity and performance. EcoCoverRF may be the preferred product.
Diagram 6
3. WEED SQUARES
Weed squares are available in the following standard sizes, pre slit to centres usually tied in bundles of 25.
| 1m x 1m (39in x 39in) |
| 65cm x 65cm (26in x 26in) |
| 50cm x 50 cm (19in x 19in) |
As for laying EcoCover rolls, the ground preparation is the same and the pinning method is also very important. It is recommended that for all weed squares larger than 65cm x 65cm (26in x 26in), 6 EcoPins per square are used, otherwise 5 EcoPins are adequate. The EcoPins can often be recovered from the ground and reused once the mat biodegradation is well advanced.
The slit in the weed square will allow weed growth unless it is slightly overlapped and properly pinned, hence for the larger mat sizes an extra EcoPin is recommended midway along the slit to ensure good weed control. (Refer diagram 9).
Diagram 7
Fold corners (dotted line) prior to pinning to provide a double purchase. The pre-cut slit is represented by the solid line.
Diagram 8
EcoPin placement for small mats – 5 EcoPins is usually adequate with 2 EcoPins along the slit once the edges are overlapped.
Diagram 9
EcoPin placement for mats larger than 65cm x 65cm (26in x 26in) a minimum of 6 EcoPins required, 3 EcoPins along the slit once the edges overlapped.
Photo 2
Illustrating the correct pinning for a 65cm x 65cm weed square – 5 EcoPins
4. OTHER PINNING / SECURING METHODS
Where the soil substrate is too hard for EcoPins to penetrate, providing the EcoCover is to be covered with a top layer (Riverstone, bark etc) to hold the mat in place, the roll edges and joins can be taped as illustrated with a paper adhesive tape. Photographs of this method are on the website – [Photo Gallery / Commercial Landscaping / Industrial Site] section.
Alternatively, a PVA adhesive spray may be used to secure the overlapped edges prior to pinning.
Diagram 10
Taped joins where pinning is too difficult due to hard substrate, or PVA + EcoPins may be used to seal edges. Then cover.
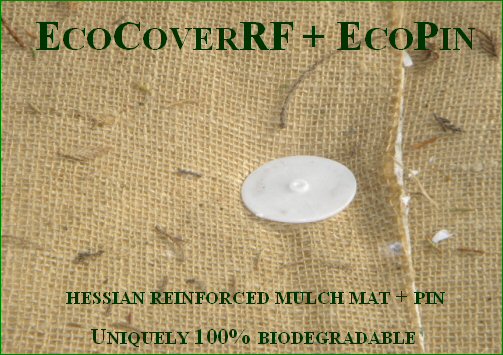
Photo 3
Close up photo of EcoCoverRF (hessian reinforced, 100% biodegradable EcoCover) for high wind and difficult terrain areas, held in place with an EcoPin.
| Note: | |
| 1. | Please ensure the contracting staff responsible for the installation of EcoCover are fully informed of our recommended laying and pinning procedures. |
| 2. | If in doubt seek advice and assistance from your nearest EcoCover office. |
| 3. | EcoCover recommends biodegradable EcoPins – uniquely providing for a sustainable future. |